Genau New Stride Electric Treadmill
User Manual
Contents
Thank you for your purchase!
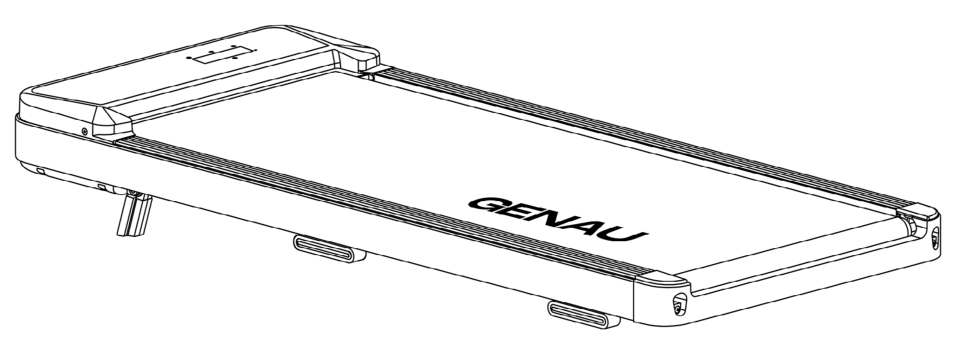
Thank you for purchasing the Genau Stride treadmill. Please use the equipment correctly to ensure your safety and health. Read the information below carefully before use.
Please read this manual before assembling and using the treadmill.
As part of our commitment to continuous improvement, the product may be updated when necessary without prior notice. If this manual does not match the product, the actual product takes precedence.
Safety Instructions
Warning!
Before starting any fitness program, you should have a medical examination, especially if you:
- have high blood pressure, high cholesterol, diabetes, chronic respiratory disease or heart disease;
- have a family history of any of the above conditions;
- are pregnant;
- are over 35 years old;
- smoke and/or are obese;
- have not exercised regularly in the past year;
- have other chronic diseases or physical impairments, or are taking any medication.
If you experience dizziness, chest pain, nausea or any other abnormal symptoms while using the treadmill, stop exercising immediately. Consult a doctor before continuing.
Intended Use
- This model can be used for running or walking.
- Suitable for home use.
General Precautions
Indoor use only
The treadmill is suitable only for dry and clean rooms. Keep it away from moisture, dust and direct sunlight. Do not place the equipment near sources of heat or water, such as in a bathroom or kitchen.
Electrical safety
- Use only grounded outlets and do not share the outlet with other appliances.
- A damaged power cord must be replaced by a qualified professional.
- Unplug the treadmill when it is not in use.
- Do not touch the plug or wires with wet hands.
- In case of overheating or overload, the system shuts down automatically. Check the mains voltage and replace faulty parts if problems are found.
Use by children
- Children may use the equipment only under adult supervision.
- The equipment is not a toy.
- Children must not be near the treadmill without adult supervision.
Use by persons with disabilities or limited capacity
Persons with disabilities or limited capacity must be supervised by a doctor or a caregiver.
Clothing and footwear
Wear sportswear and athletic shoes. Avoid loose or baggy clothing that could get caught in the mechanisms and moving parts of the treadmill.
Installation site requirements
The owner is responsible for taking into account the space requirements around the treadmill during operation, voluntary and industry standards, fire safety regulations and other requirements of national legislation. Recommended minimum clearance around the equipment according to EU rules (since March 1, 2017): for access and passage, at least 0.5 m to the left, right and in front of the treadmill, and 2 m behind it.
Assembly requirements
Follow the assembly instructions and assemble the treadmill only on a level surface. Do not plug the treadmill in until assembly is complete. Make sure all assembly parts are present according to the parts list. If you have any difficulties with assembly, contact the seller.
Maximum user weight
Observe the maximum user weight stated in the specifications.
Prohibited actions
- Do not jump on the treadmill, rock it or run barefoot.
- Do not use the treadmill if assembly has not been fully completed or if internal mechanisms are exposed.
- Do not use the treadmill if it is defective or damaged.
- Do not use the treadmill if you feel unwell.
- Only one person may use the treadmill at a time.
- Do not use the treadmill under the influence of alcohol or drugs.
- Keep other people, pets and children away from moving parts during use — this may cause injury.
Operation and Safety
Warm-up
Always warm up your muscles before exercising.
Equipment inspection
Before each use, inspect the treadmill for wear of parts and moving components. Make sure the treadmill is fully functional and safe.
Running belt
To avoid injury, take special care when stepping onto or off the running belt.
Starting a workout and starting the belt
Stand on the side rails, press "Start" and wait until the belt starts moving at low speed. Then carefully step onto the belt. This reduces the load on the motor at startup.
Safety key
Always clip the safety key to your clothing. It will stop the treadmill in an emergency. Keep the key away from children.
Health monitoring
If you feel dizzy, have chest pain or feel unwell in any other way, stop exercising immediately and see a doctor. People over 35 or with chronic diseases are advised to consult a doctor before starting to exercise.
Disposal
The electronic components in this equipment are considered hazardous to the environment. Please dispose of them properly in accordance with national legislation.
Product Components
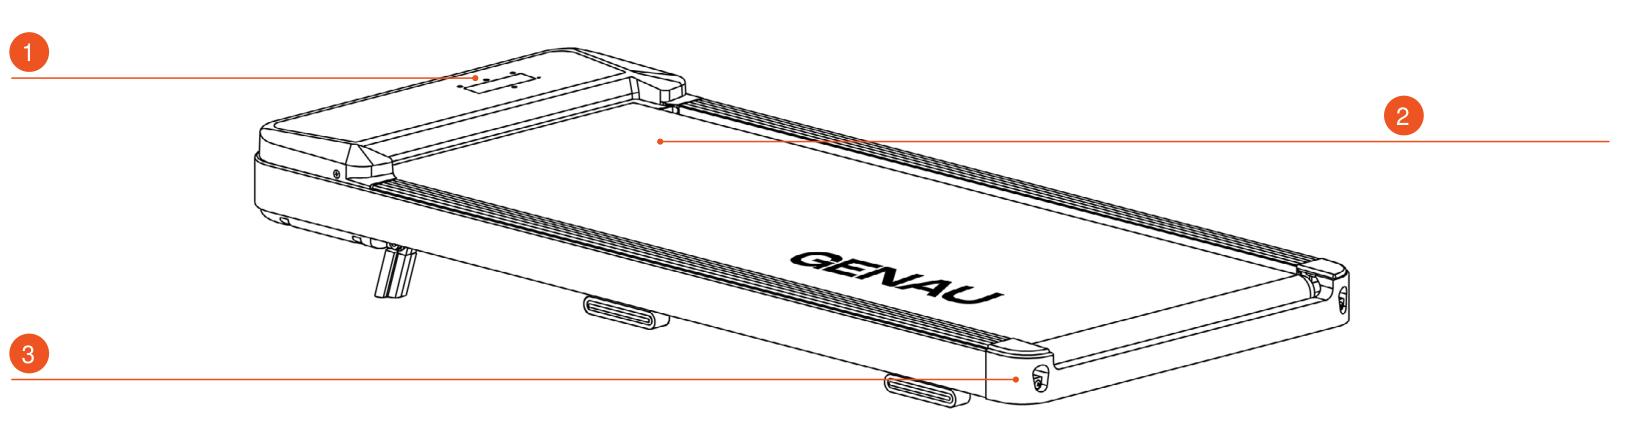
- Motor cover
- Running belt
- End cap
Packing List
| No. | Item | Unit | Qty |
|---|---|---|---|
| 1 | Treadmill, assembled | set | 1 |
| 2 | Accessory bag | pcs | 1 |
Accessory Bag Contents
| No. | Item | Unit | Qty |
|---|---|---|---|
| 1 | Hex key 5 mm | pcs | 1 |
| 2 | Remote control | pcs | 1 |
| 3 | Silicone lubricant | pcs | 1 |
| 4 | User manual | pcs | 1 |
Assembly
Take the treadmill out of the packaging and place it on the floor. No installation is required — simply take it out of the box!
Leveling the Treadmill to the Floor
If there is a gap between the treadmill and the floor, adjust the rear adjustable feet so that the front and rear of the treadmill are in stable contact with the surface.
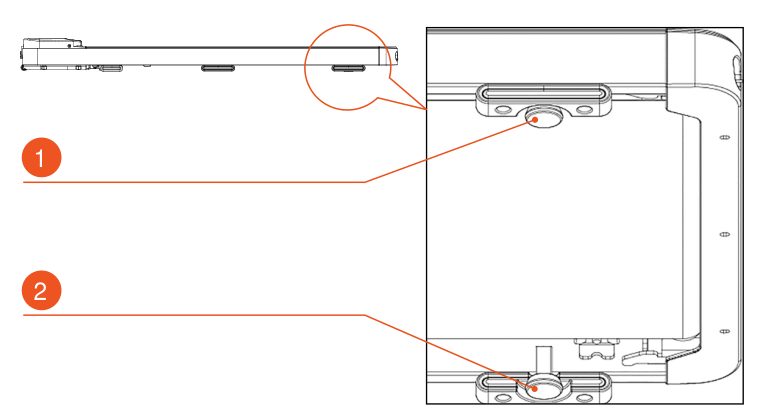
- Adjustable foot
- Adjustable foot
Incline Adjustment
- You can change the incline angle of the treadmill by turning the front feet by hand.
- Adjust the incline by setting the adjusters to the same position on both sides.
- Then, if necessary, adjust the rear foot to match the floor level.
- Make sure all feet are in contact with the surface — otherwise noise and damage to the equipment may occur.
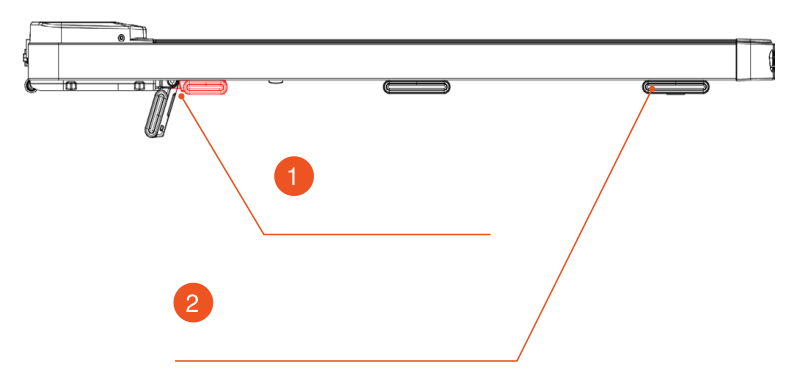
- Incline adjustment leg
- Adjustable foot — floor unevenness compensator
Setup and Operation
Using the Treadmill
- Plug the power cord into the outlet and turn on the power with the toggle switch (red switch) — see (1).
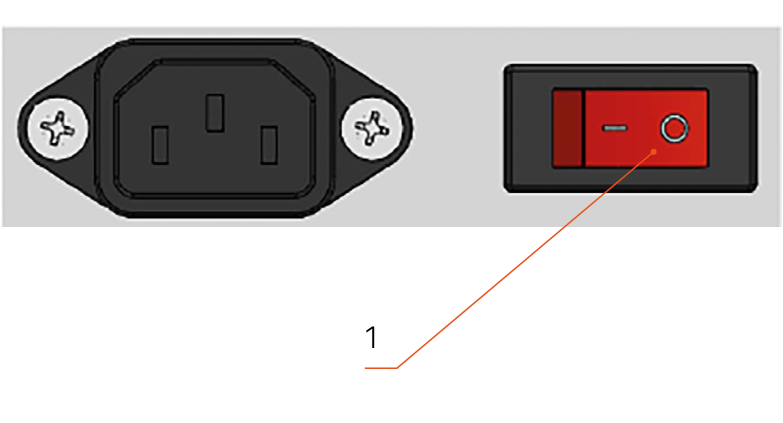
- When the indicator lights up, a beep will sound and the display will turn on.
Using the Remote Control
The remote control is paired with the treadmill at the factory before shipment. You can start using it as soon as you receive it.
If the remote control does not work, pair it again:
- Turn on the treadmill.
- Press and hold the “Start” button on the remote control for about 7 seconds.
- If the remote control emits a series of beeps, pairing was successful.
- If there are no beeps, pairing failed. Try again.
Once paired successfully, the remote control can operate the treadmill without needing to be reconnected.
Remote Control Buttons
- Start/Pause
- Stop
- Mode
- Speed +
- Speed −
Display Functions
| Function | Description |
|---|---|
| Time display | When the time indicator is on, the workout duration is shown. |
| Speed display | When the speed indicator is on, the current speed is shown. |
| Distance display | When the indicator is on, the distance covered is shown. |
| Calorie display | When the indicator is on, the number of calories burned is shown. |
| Step count display | When the indicator is on, the current number of steps taken is shown. |
Button Functions
| Name | Description |
|---|---|
| START/PAUSE | In standby, press this button to start the treadmill. During operation, pressing it pauses the belt. Pressing it again resumes operation. |
| STOP | During operation, press Stop to stop the treadmill completely. All data will be reset, and the treadmill will switch to manual mode after it comes to a complete stop. |
| Speed + | Increases the speed while the treadmill is running. |
| Speed - | Decreases the speed while the treadmill is running. |
Error Codes and Troubleshooting
| Error code | Problem description | Possible cause and solution |
|---|---|---|
| E1 | Communication error: when the power is turned on, the connection between the lower controller and the console is lost. | Check the cable between the console and the controller. Make sure every connector is fully plugged in. If the cable is damaged, replace it. |
| E2 | No signal from the motor. | Check that the motor cable is connected correctly. If not, reconnect it. Check the cable for damage or a burning smell. If present, replace the motor. |
| E5 | Overcurrent protection. | An overload may trigger the protection or stop the motor because of jamming. Restart the treadmill. Check the motor for liquid or a burning smell — if present, replace the motor. If the controller has burned out, replace it. Check the supply voltage. If it is out of range, connect the correct voltage and test again. |
| E6 | Surge protection: abnormal voltage or a fault in the motor power circuit. | Check whether the voltage is too low (less than 50% of nominal). Use the correct voltage and test again. If the controller has burned out, replace it. Make sure the motor cable is connected correctly. |
Care, Storage and Maintenance
Maintenance
Regular cleaning
Turn off the power before cleaning and use a minimal amount of water and soapy solution to prevent moisture from getting onto electrical parts.
Clean the running belt and other parts of the treadmill regularly. After each workout, wipe down the entire treadmill, including the console, with a mild soapy solution, then dry it thoroughly with a dry cloth. Simple care will keep the equipment looking great for many years. Do not use abrasive or rough brushes and cloths, as they may damage the surface of the equipment. Do not let cleaning agents or liquids get onto the surface of the equipment. Do not use harsh chemicals or solvents to clean the treadmill.
Lubricating the running belt
Use only lubricants recommended by the manufacturer, such as silicone treadmill lubricant. Other types and compositions of lubricants may damage the equipment.
Lubrication frequency
- Light use (less than 3 hours per week): lubricate once every 10 months.
- Heavy use (more than 7 hours per week): lubricate every 2–5 months.
Lubrication procedure
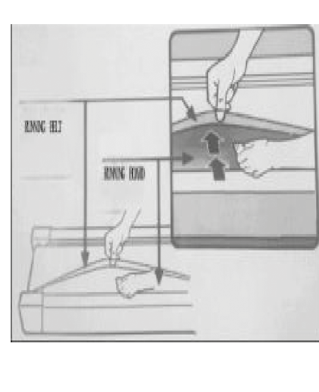
Lift the running belt, locate the caps and spread the lubricant evenly along the entire length of the belt.
After applying the lubricant, run the treadmill at 4–5 km/h and walk on it for a few minutes so that the lubricant spreads evenly over the deck.
Avoid over-lubrication
Do not apply too much lubricant, as this can make the belt too slippery and dangerous. Remove excess lubricant with a clean towel.
Running Belt Adjustment
Check and adjust the tension and alignment of the running belt to prevent wear and ensure safe operation.
Checking belt alignment
Make sure the treadmill is placed on a level surface. Run the belt at 3–8 km/h and watch how it moves. If the belt drifts to the left or right, use the adjustment bolts to correct its position.
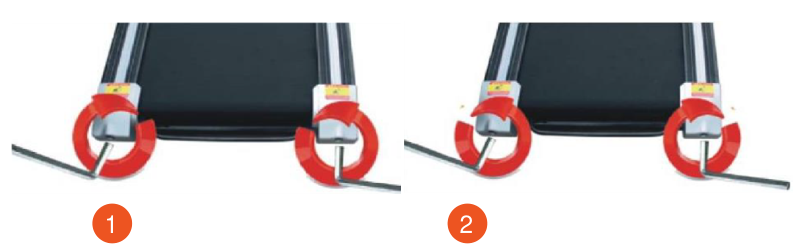
- Belt drifting to the left
- Belt drifting to the right
Belt drifting to the left
- Turn the left adjustment bolt 1/2 turn clockwise.
- Then turn the right adjustment bolt 1/2 turn counterclockwise.
- Check the belt position after 1–2 minutes. If the belt has not returned to the center, repeat the procedure.
Belt drifting to the right
- Turn the right adjustment bolt 1/2 turn clockwise.
- Then turn the left adjustment bolt 1/2 turn counterclockwise.
- Check the belt position after 1–2 minutes. Repeat the adjustment if necessary.
Adjusting belt tension
- If the belt is too loose, it may slip during operation. To check the tension, run the treadmill at 1 km/h and press lightly on the belt with your foot.
- If the belt stops while the motor and rollers keep running, the tension is too loose and must be tightened.
- Turn the adjustment bolts at both ends of the belt 1/2 turn clockwise. Make sure you turn both bolts the same number of times for even tension.
- Check the tension again and make sure the belt does not slip but is not overtightened.
Avoid overtightening
- Do not overtighten the running belt, as this puts excessive pressure on the front and rear roller bearings, causing squeaking and accelerated wear.
- With correct tension, you can slightly lift the edges of the belt by 50–70 mm on both sides.
Storing the Treadmill
Recommended storage and operating conditions
- Temperature: +10…+35 °C.
- Humidity: 50–75%.
- Acclimatization: if the treadmill has been stored at low temperature or high humidity (there are signs of condensation), keep it under normal conditions for at least 2–4 hours before use. Only then may you start using the treadmill.
Training Tips and Recommendations
Warm-up and Cool-down
A successful exercise program consists of three parts: warm-up, cardio training and cool-down.
The warm-up is a very important part of a workout. It should be done before every workout. The warm-up helps warm up the body, stretch the muscles and let the body adapt to more intense exercise. Repeating the warm-up at the end of the exercise can help relieve muscle soreness.
We suggest doing appropriate warm-up and cool-down exercises according to the following scheme:
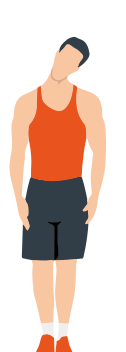
Head rolls
First tilt your head toward your right shoulder, stretch your neck and rotate your head once clockwise and once counterclockwise; then tilt your head toward your left shoulder and make one counterclockwise rotation. Repeat.
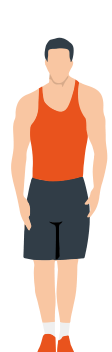
Shoulder lifts
Raise your left shoulder and make 5 backward rotations; then raise your right shoulder and make 5 backward rotations, alternating sides.
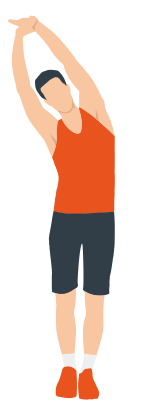
Side stretch
Raise your arms above your head, then grasp your right wrist with your left hand and reach upward until you feel your right arm fully stretched. Hold for 5 seconds before switching to the other arm.
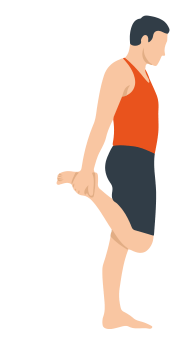
Quadriceps stretch
Holding onto a wall with your right hand for balance, pull your left foot back with your left hand, bringing the heel as close to your buttock as possible. Hold for 15 seconds, then repeat with the other leg.
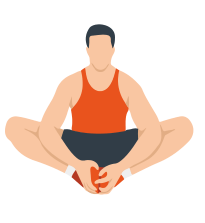
Inner thigh stretch
Sitting on the floor, put the soles of your feet together, clasp them with both hands and pull them in as close to your body as possible. Slowly press down on both heels and hold this position for 15 seconds.
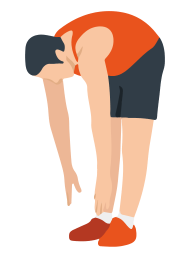
Toe touch
Slowly bend forward, relax your back and shoulders and reach for your toes. Bend as low as you can and hold the position for up to 15 seconds.
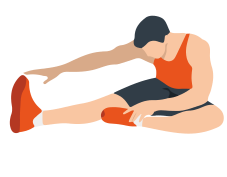
Hamstring stretch
Sit down, straighten your right leg and bend your left leg. Hold your left ankle with your left hand and pull it inward so that your left foot is as close to your body as possible, with the sole against the inner side of your right thigh. Then lean your body forward and reach both hands toward your toes — the deeper the stretch, the better. Hold this position for 15 seconds, then switch legs.
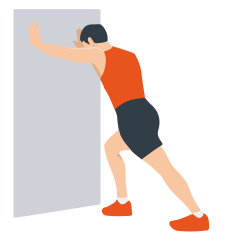
Calf stretch
Lean against a wall with both hands, tilt your body at a 45-degree angle to the floor and alternately move your left and right legs back, as if walking.
Warranty
Genau guarantees the high quality and reliability of its products. We strive to offer only the best, which is why all of our equipment comes with a warranty.
Warranty Terms
- The warranty period starts from the date of sale.
- The warranty covers defects caused by manufacturing faults or defective materials.
- Warranty service is carried out at authorized service centers.
- If the product breaks down during the warranty period, the customer must bring this warranty card and the complete product to a service center for diagnostics and repair.
- If the warranty claim is confirmed, the product will be repaired or replaced free of charge.
- The warranty does not cover the following cases:
- mechanical damage caused by improper use or transportation;
- damage caused by liquids, fire, chemicals or other external factors;
- failures caused by not following the operating instructions;
- modifications to the design or repairs carried out by unauthorized persons without the approval of the Service;
- consumables and components with a limited service life (belts, batteries, etc.).
Warranty claims
To receive warranty service, the customer should contact the seller (the place where the equipment was purchased).
Specifications
| Parameter | Value |
|---|---|
| Rated voltage | AC 220–240 V |
| Rated frequency | 50–60 Hz |
| Speed | 1.0–6 km/h |
| Running belt size | 1000×410 mm |
| Max. user weight | 110 kg |
| Dimensions (unfolded) | 1120×485×100 mm |
| Functions | Walking |
Manufacturer: Zhejiang Lijiujia Sports Equipment Co., Ltd. ADD No.88 Yuegui South Road, Xicheng Street, Yongkang, Zhejiang, China.
Service
For questions about assembly, operation and warranty, please contact Genau service in Kyrgyzstan.
Genau GmbH LLC (ОсОО «Генау ГМБХ»), Kyrgyzstan. Phone: +996 778 639 000