Genau Spin bike XT-750 exercise bike
User Manual
Contents
Thank you for your purchase!
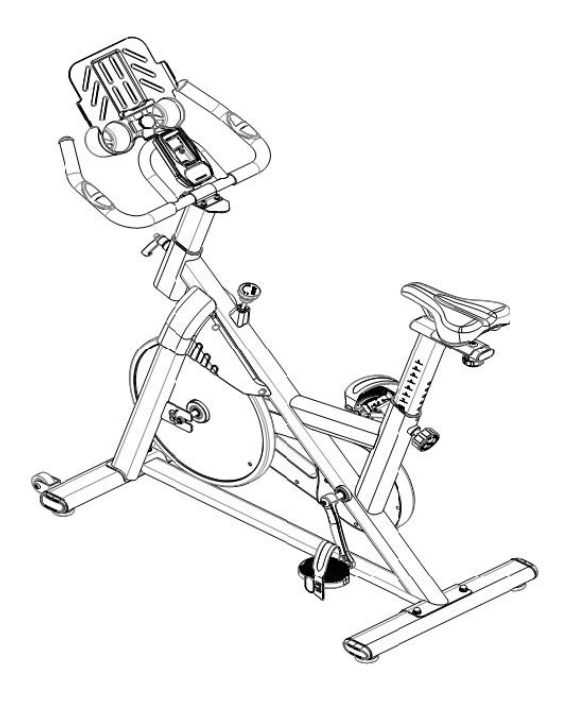
Thank you for purchasing the Genau Spin bike XT-750 exercise bike. Please use the equipment correctly to ensure your safety and health. Before you start using it, read the information below carefully.
Please read this manual before assembling and using the treadmill.
As part of our commitment to continuous improvement, the product may be updated when necessary without prior notice. If this manual does not match the product, the actual product takes precedence.
Safety Instructions
- This exercise bike is intended for indoor use. Place it on a level surface. Do not put foreign objects on the equipment.
- If the power cord is damaged, it must be replaced by a specialist from the manufacturer or a service center. If the equipment is not used for a long time, disconnect the power.
- Always unplug the device from the socket if it is not used for a long time.
- This product belongs to category H. After use, lock the flywheel to avoid injury.
- The equipment is not intended for people with disabilities or for children. Do not use it if you feel unwell.
- Do not use the equipment in a dusty or overly damp room. Avoid static electricity. Use only original parts.
- Do not place the equipment near heating appliances or moving objects.
- Disconnect the power before moving the equipment. Do not disassemble the device yourself.
- Wear close-fitting, fastened clothing while exercising. Do not allow any part of your clothing to touch moving parts.
- If you feel unwell, stop exercising immediately and consult a doctor.
- Use only suitable sockets. Do not touch the plug with wet hands.
- The equipment is intended for home use only. It is not suitable for professional training or medical purposes.
- Do not use the equipment if the housing or welded seams are damaged.
- Do not exercise after eating, when tired, or when feeling unwell — it may be harmful to your health.
- Do not allow needles, debris or water to get on the power plug.
- Always disconnect the equipment from the mains after use.
Product Components
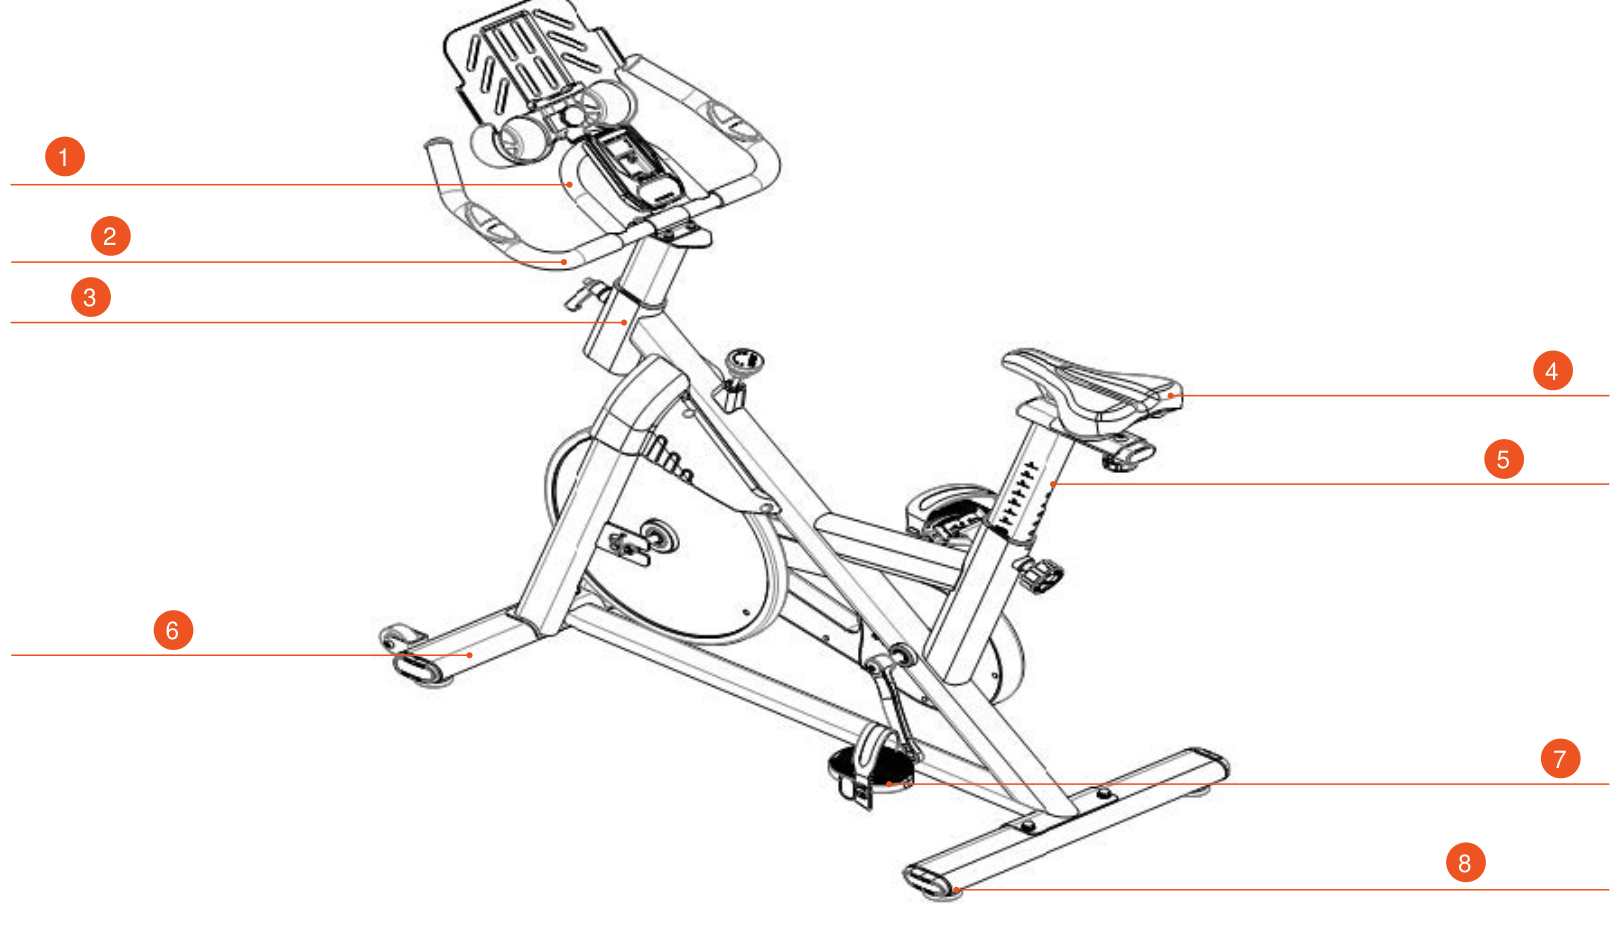
- Console
- Front handlebar
- Handlebar post
- Seat
- Seat post
- Front stabilizer
- Pedal
- Rear stabilizer
Packing List
| No. | Item | Unit | Qty |
|---|---|---|---|
| 1 | Frame | pcs | 1 |
| 2 | Front stabilizer | set | 1 |
| 3 | Rear stabilizer | set | 1 |
| 4 | Pedal | set | 1 |
| 5 | Seat | set | 1 |
| 6 | Handlebar post | set | 1 |
| 7 | Multifunctional holder | pcs | 1 |
| 8 | Front handlebar | pcs | 1 |
| 9 | Seat post | pcs | 1 |
| 10 | User Manual | pcs | 1 |
| 11 | Console | pcs | 1 |
Tool list
| No. | Item | Unit | Qty |
|---|---|---|---|
| 1 | Hex key 5 mm | pcs | 1 |
| 2 | Combination wrench | pcs | 1 |
Fastener identification table
This table is provided to make it easier to identify the fasteners used during assembly. Use the scale to check the length of bolts and screws.

Assembly
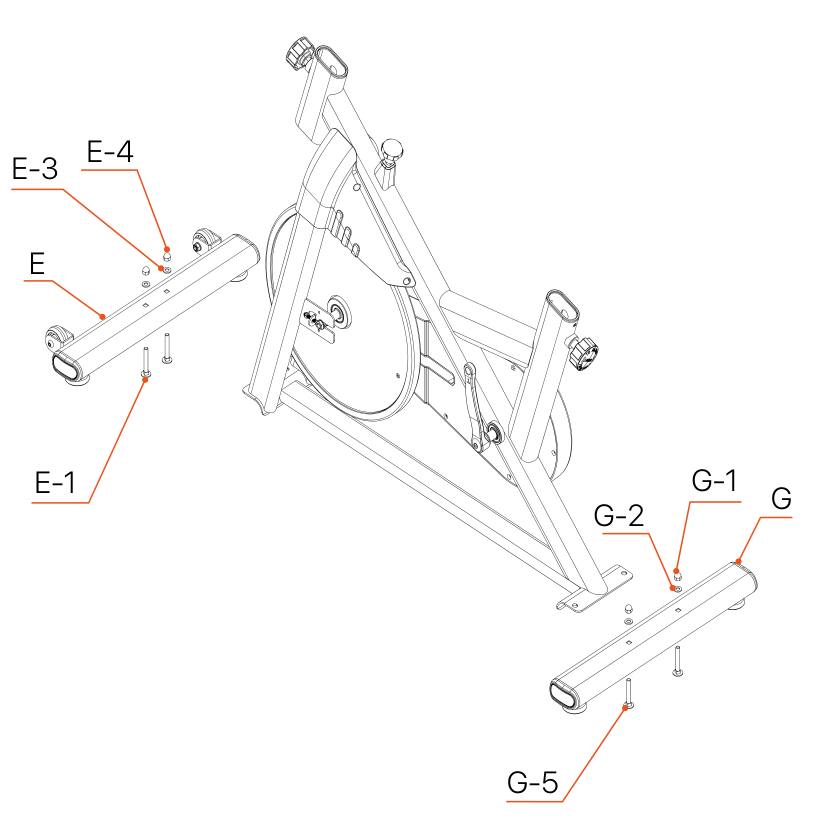
- First take out the front stabilizer E# and remove the pre-installed parts E-1#, E-3#, E-4#.
- Take out the rear stabilizer G# and remove the pre-installed parts G-1#, G-2#, G-5#.
- Install the stabilizers as shown in the figure: first the front stabilizer, then the rear stabilizer.
- After installation, use the combination wrench L-2# to tighten nuts E-4# and G-1#.
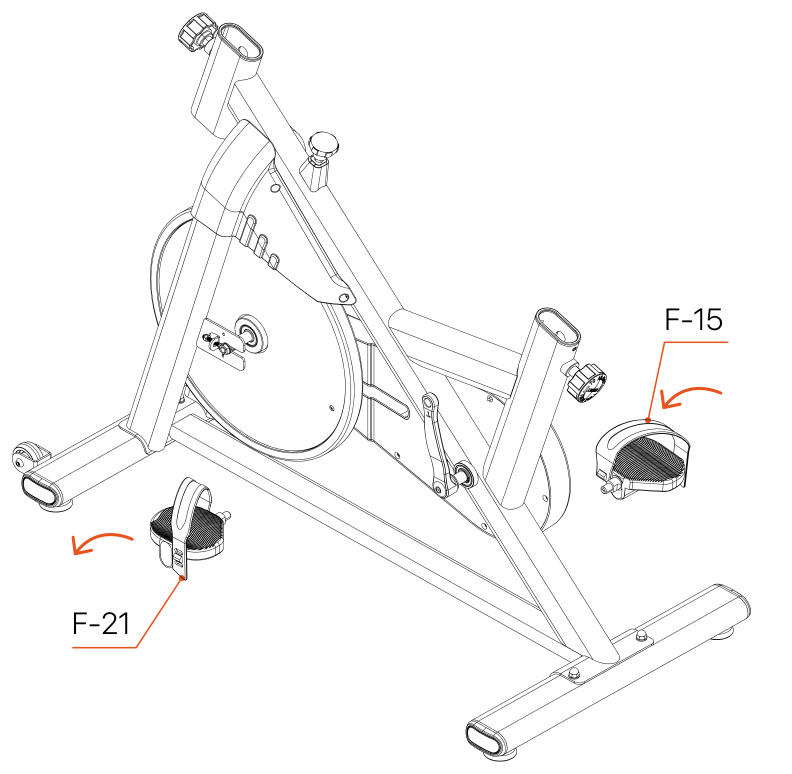
- Take the right pedal F-15# and the left pedal F-21# out of the packaging.
- Install them as shown in the figure.
- Use the combination wrench L-2#, turn in the direction of the arrow, and then tighten.
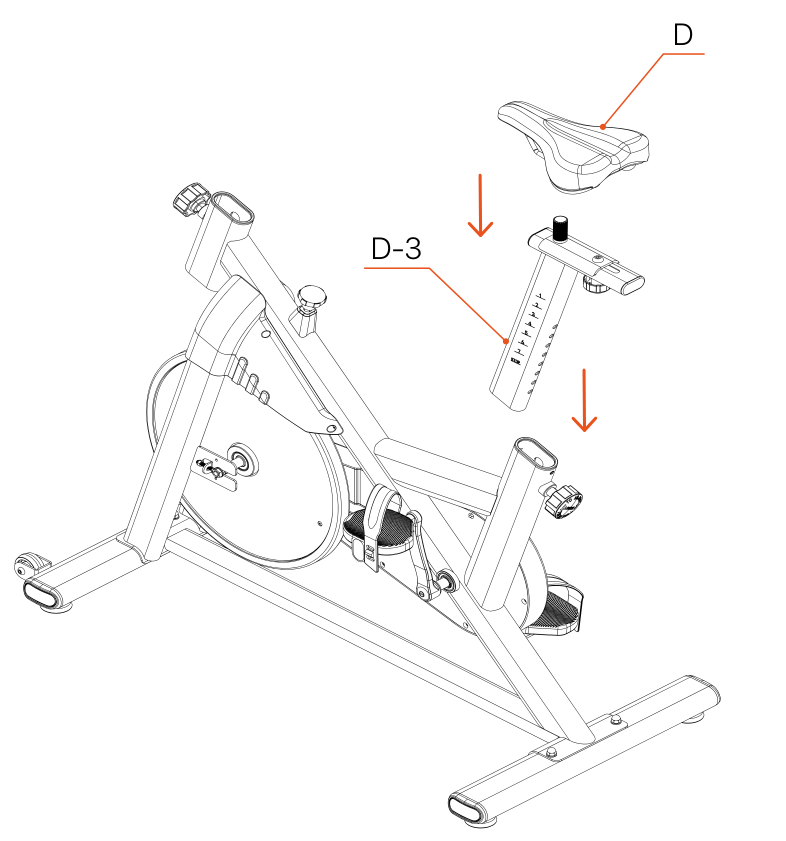
- Take the seat post D-3# and the seat D# out of the packaging.
- Install them as shown in the figure.
- Turn the locking adjustment knob counterclockwise, insert the seat post into the frame, and turn the knob back to lock it.
- After choosing the desired angle and position, use the combination wrench L-2# to tighten the seat.
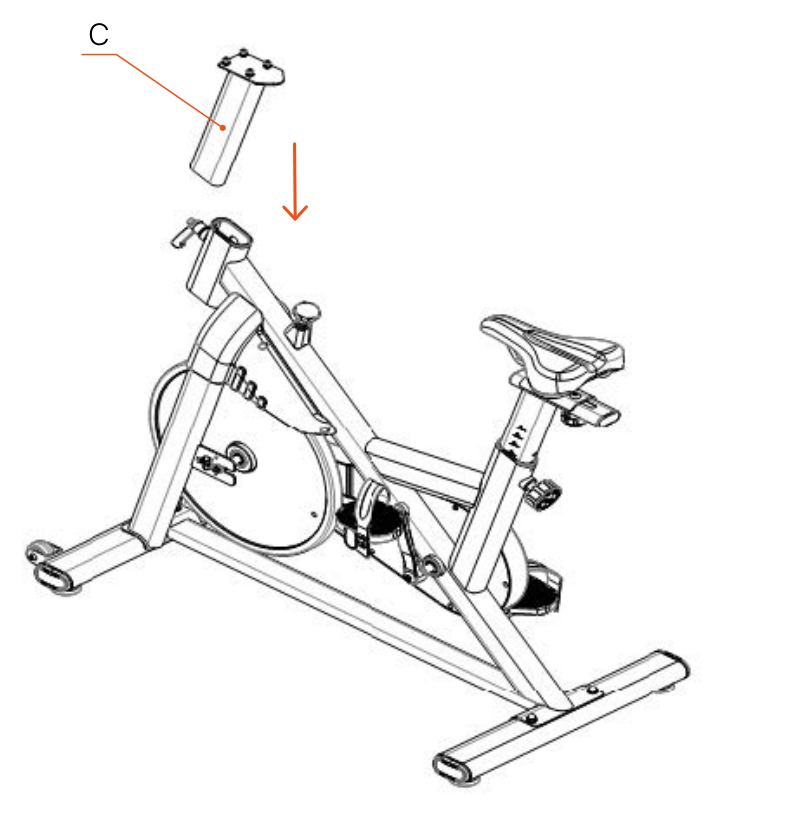
Take the handlebar post C#. Turn the locking knob counterclockwise and pull it outward, then insert the handlebar post into the frame and turn the knob back to lock it.
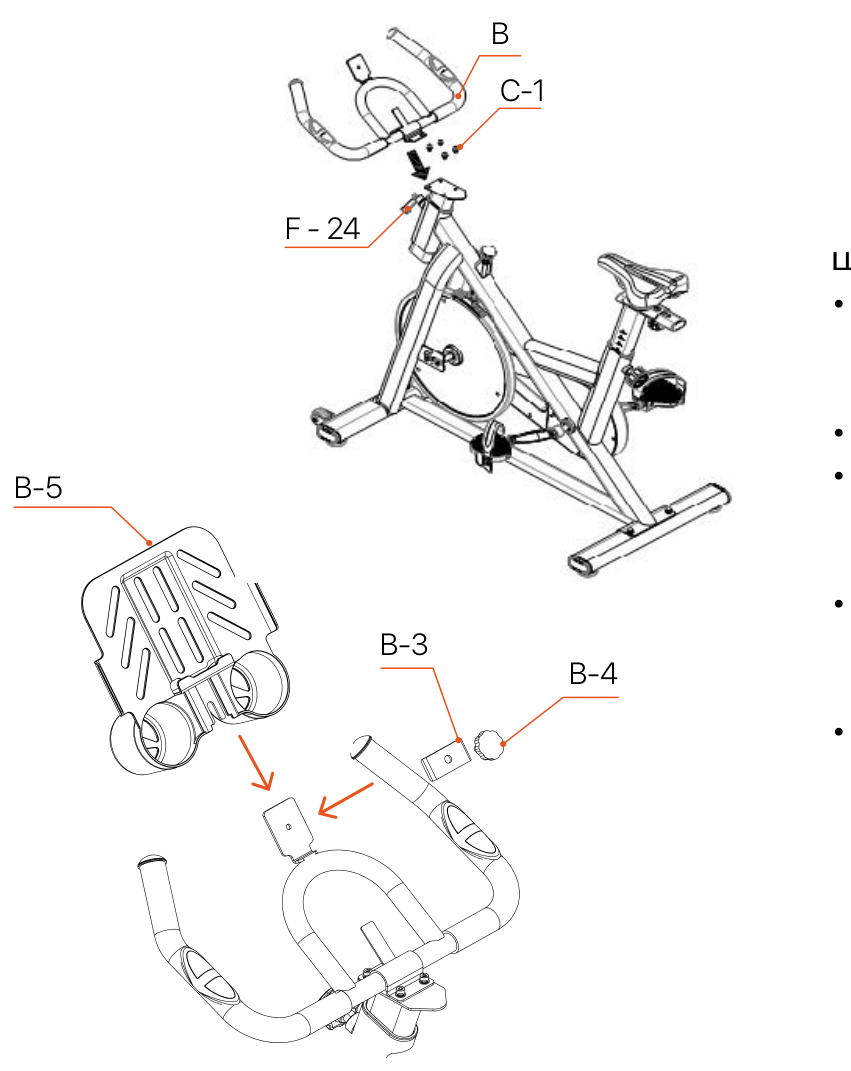
- Take the front handlebar B# and the three pre-installed combined hex socket screws C-1#.
- Install as shown in the figure.
- Align the hole of the front handlebar with the holes of the handlebar post, insert the three hex socket screws and secure them with the hex key L-1#.
- Take the multifunctional holder B-5# and insert it into the handlebar, following the direction of the arrow.
- Align part B-3 with the fixing part and use screw B-4 to tighten the multifunctional bracket.
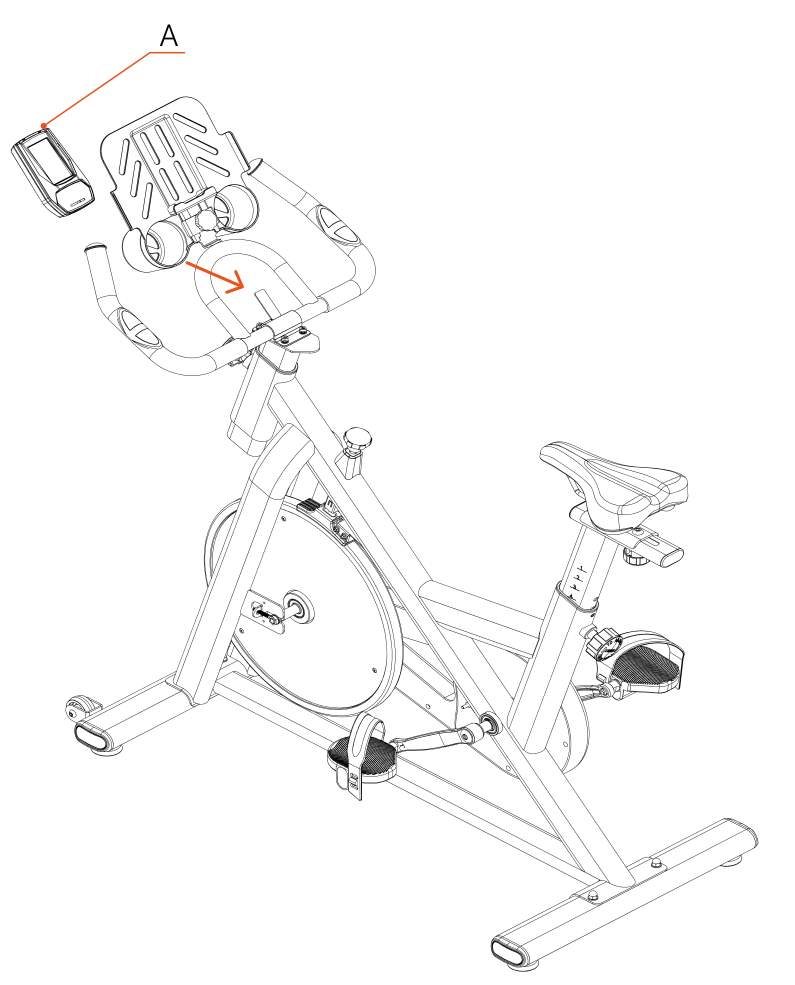
Take the monitor A#, attach it to the front handlebar, and insert the battery into the monitor — the assembly of the bike is now fully complete.
Operating instructions
Do not fully tighten all screws until all assembly steps are completed. After finishing, check the product thoroughly before use.
Adjusting the handlebar and seat height
Adjust the height of the handlebar and seat using the adjustment knobs — choose the position that matches your riding posture and provides maximum comfort.
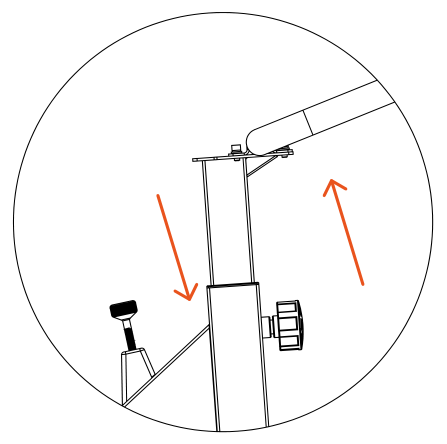
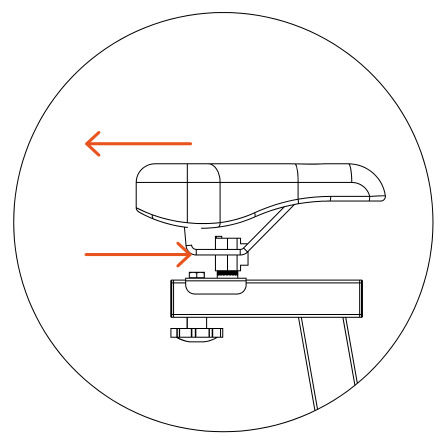
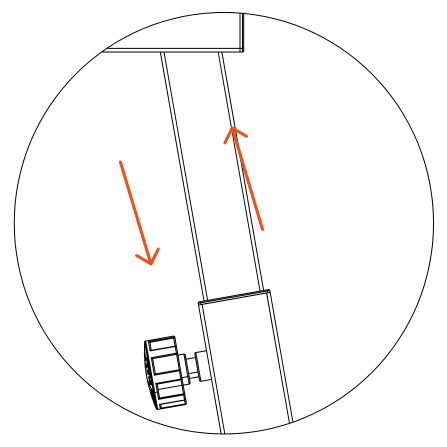
Adjusting the seat
- You can adjust the distance between the seat and the handlebar with the adjustment knob under the seat.
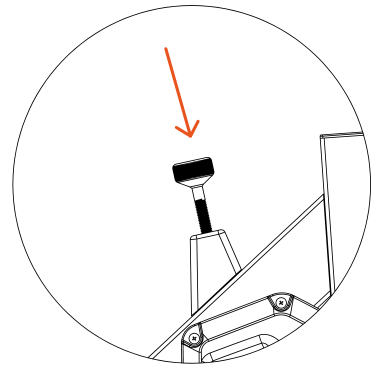
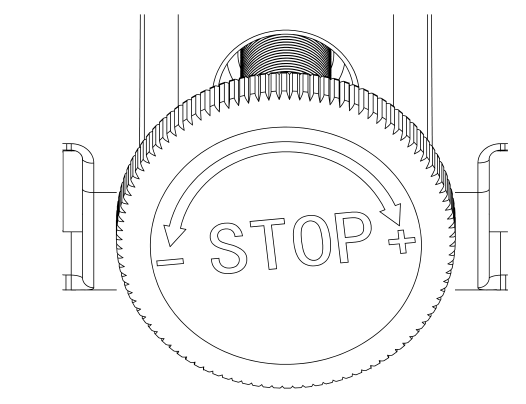
- When the exercise bike is not in use, set the maximum resistance level by turning the brake knob, and loosen it before the next use.
Care, Storage and Maintenance
Cleaning
Regular and thorough cleaning will extend the service life of the exercise bike.
Remove dust and dirt, and make sure your shoes are clean so as not to bring debris inside the equipment.
Maintenance
Replace worn or damaged parts immediately.
Do not use the equipment until faulty parts have been replaced. Pay special attention to parts subject to wear.
Workout Tips and Recommendations
Warm-up and Cool-down
A successful exercise program consists of three parts: warm-up, cardio training and cool-down.
Warm-up is a very important part of a workout. A warm-up must be done before every workout. It helps warm up the body, stretch the muscles and allows the body to adapt to more intense exercise.
Repeating the warm-up at the end of the exercise can help relieve muscle soreness.
We suggest doing the appropriate warm-up and cool-down exercises according to the following scheme:
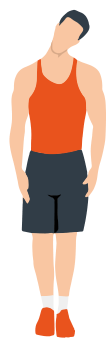
Head rolls
First pull your head toward your right shoulder, stretch your neck and turn your head once clockwise and once counterclockwise; pull your head toward your left shoulder and make one turn counterclockwise. Repeat.
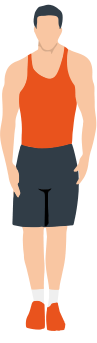
Shoulder lifts
Raise your left shoulder and make 5 backward rotations; then raise your right shoulder and make 5 backward rotations, alternating sides.
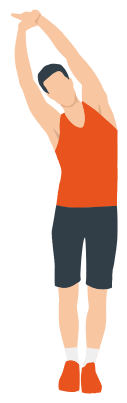
Side stretch
Raise your arms above your head, then grasp your right wrist with your left hand and reach upward until you feel your right arm fully stretched. Hold for 5 seconds before switching to the other arm.
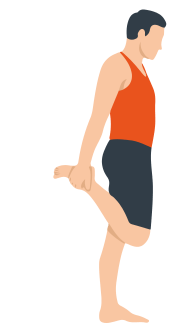
Quadriceps stretch
Holding onto a wall with your right hand for balance, pull your left foot back with your left hand, bringing the heel as close to your buttock as possible. Hold for 15 seconds, then repeat with the other leg.
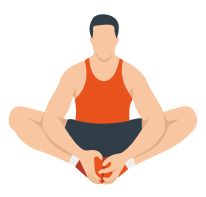
Inner thigh stretch
Sitting on the floor, put the soles of your feet together, clasp them with both hands and pull them in as close to your body as possible. Slowly press down on both heels and hold this position for 15 seconds.
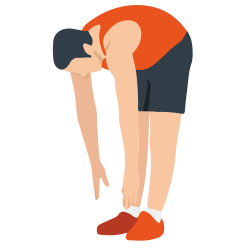
Toe touch
Slowly bend forward, relax your back and shoulders and reach for your toes. Bend as low as you can and hold the position for up to 15 seconds.
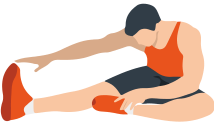
Hamstring stretch
Sit down, straighten your right leg, bend your left leg, grab your left ankle with your left hand and push it inward so that your left foot is as close to your torso as possible and the sole of the foot is against the inside of your right thigh. Then press forward with your body and reach both arms forward to touch your toes; the more pressure, the better. Hold this position for 15 seconds and switch to the left leg.
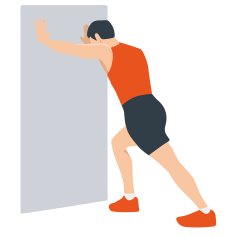
Calf stretch
Lean against a wall with both hands, tilt your body at a 45-degree angle to the floor and alternately move your left and right legs back, as if walking.
Warranty
Genau guarantees the high quality and reliability of its products. We strive to offer only the best, which is why all of our equipment comes with a warranty.
Warranty Terms
- The warranty period starts from the date of sale.
- The warranty covers defects caused by manufacturing faults or defective materials.
- Warranty service is carried out at authorized service centers.
- If the product breaks down during the warranty period, the customer must bring this warranty card and the complete product to a service center for diagnostics and repair.
- If the warranty claim is confirmed, the product will be repaired or replaced free of charge.
- The warranty does not cover the following cases:
- mechanical damage caused by improper use or transportation;
- damage caused by liquids, fire, chemicals or other external factors;
- failures caused by not following the operating instructions;
- modifications to the design or repairs carried out by unauthorized persons without the approval of the Service;
- consumables and components with a limited service life (belts, batteries, etc.).
Warranty claims
To receive warranty service, the customer should contact the seller (the place where the equipment was purchased).
Service
For questions about assembly, operation and warranty, please contact Genau service in Kyrgyzstan.
Genau GmbH LLC (ОсОО «Генау ГМБХ»), Kyrgyzstan. Phone: +996 778 639 000